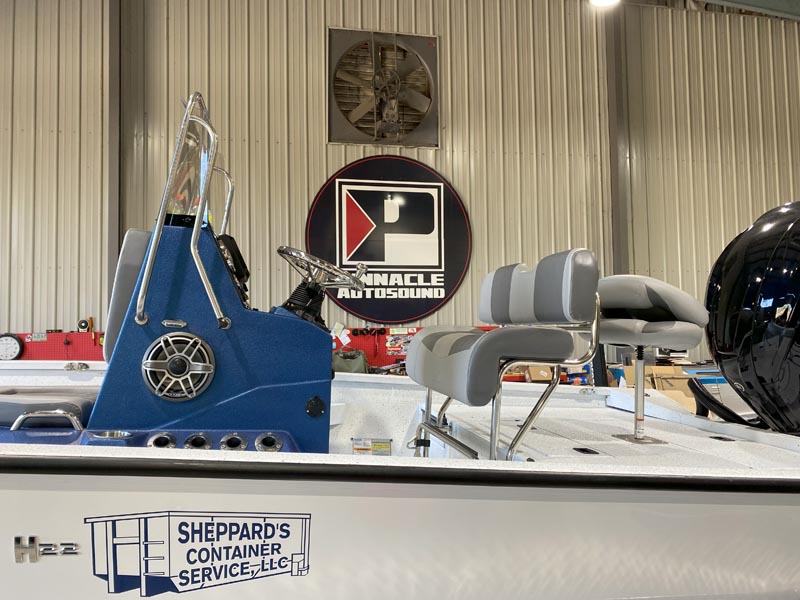
The folks over at Sheppard’s Container Service asked us about adding new boat speakers to their Xpress bay boat. We talked with them about what they were looking for from the audio system and put together a complete system that would exceed their needs while staying within their budget. New Boat Speakers by JL Audio […]
JL Audio
Joey Knapp of Pinnacle Autosound Now A JL Audio MAX Certified Tuner
This post has been taken from a social media post sharing the personal experience of Joey Knapp through the MAX Certified training and testing process Audio Tuning Roots Long ago, while writing for Mobile Electronics Magazine, I created a series on tuning audio systems. My plan for the series was based on my understanding of […]
Ford Edge Audio Upgrade for McAlpin Client
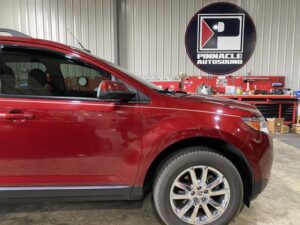
A while back, a client from McAlpin contacted us about getting a Ford Edge audio upgrade. He was not very impressed with the output and quality of sound from his factory audio system. We talked with him about some options, and then, after a few emails back and forth to narrow down the equipment, we […]
Polaris RZR Audio System Featuring Rockford Tower Speakers
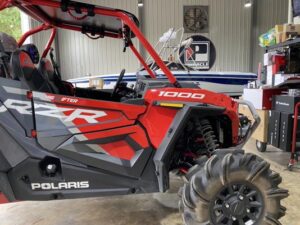
A new client reached out to us a while back about installing a Polaris RZR audio system in his new side-by-side. He didn’t want anything too complicated but wanted to hear it while he was riding and make sure others enjoyed his music too. Many of our clients have similar goals for their UTV, so […]
Chevrolet Colorado Bass Upgrade and Underbody Lighting
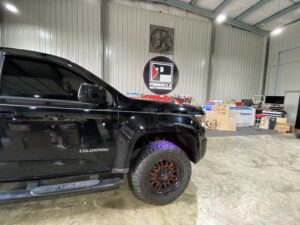
A while back, the owner of this Chevrolet Colorado stopped by to talk about upgrading the audio and lighting in his truck. After looking at the truck, we devised a plan for his Colorado bass upgrade and underbody lighting. Underbody Lighting The client wanted to add a bit of underbody lighting to make his Colorado […]
Elite Golf Cart Audio System for Live Oak Client
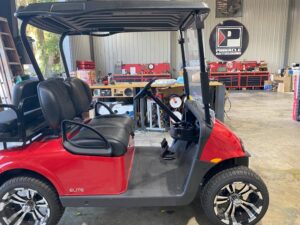
A client from Live Oak recently contacted us about adding some audio to his mom’s Elite golf cart. He wanted something that would sound good and be reasonably easy to use. We put together a golf cart audio system that he approved of, and he set up an appointment to bring us the cart. Custom […]
Sportsman JL Audio Marine Speaker Upgrade: PART TWO
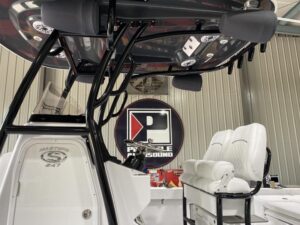
The client from our previous Sportsman article gave us another call shortly after picking his boat up. He was happy with how the boat sounded while in it but wanted more sound for the people around the boat. Knowing this client likes the best, we devised an awesome option for him. The plan would utilize […]
Sportsman JL Audio Marine Speaker Upgrade: PART ONE
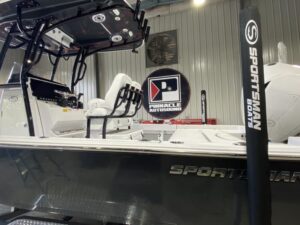
One of our long-time clients contacted us about upgrading the speakers in his Sportsman Masters 247 boat. As many do, his Sportsman came equipped with some JL Audio speakers, but he wanted more output. Our solution was to upgrade the speakers and radio and then add amplifiers and subwoofers. The client liked our plan, and […]
Ram Stereo System Upgrade for Work Truck
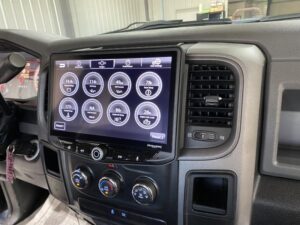
One of our good friends acquired this Ram work truck and wanted to upgrade its stereo. The client wanted to use the 5-channel JL Audio amplifier we used in a previous stereo system. Along with upgrading the sound, he also wanted to add some more tech to his dashboard. Ram Stereo Gone BIG The client […]
Lake City Client Gets Jeep Bass Upgrade for Rubicon
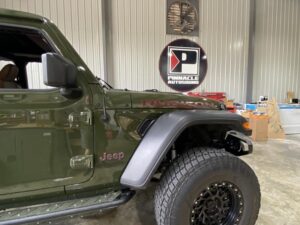
We have worked on quite a few Jeeps during the years. We like them because they are relatively straightforward to work on, and it is easy to improve the sound over the factory audio systems. Most Jeep clients like modifying their vehicles, and we love modifying vehicles, a perfect match! The owner of this Rubicon […]