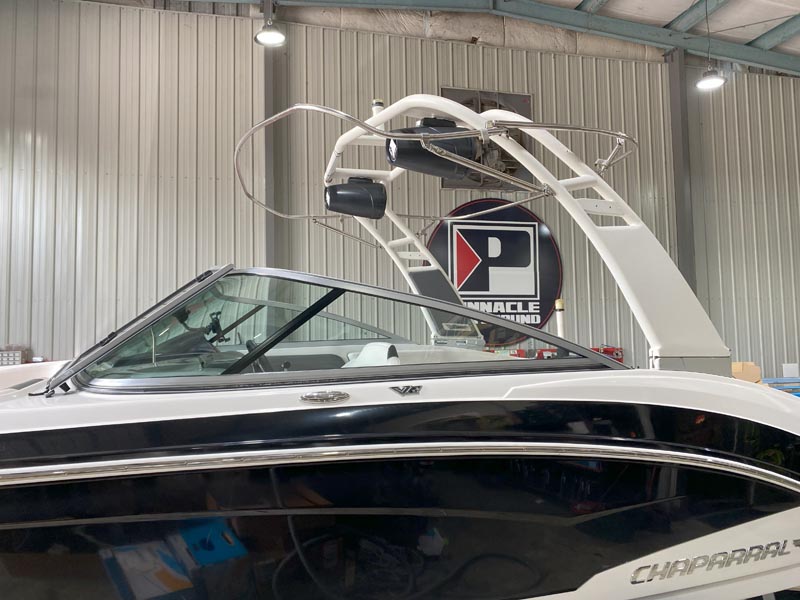
A Lake City client brought us his Chaparral for a boat stereo system upgrade. He wanted his ski boat to not only sound good inside, but he also wanted skiers to be able to enjoy the music while skiing. We went over a few options with the client and scheduled the appointment. Boat Stereo System […]
Lighting
Polaris Slingshot Audio and Lighting Upgrades
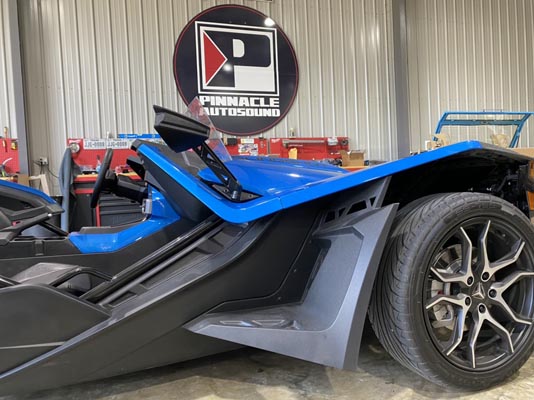
The owner of this Polaris Slingshot came to Pinnacle Autosound to see about adding some audio in the rear of his autocycle. He was also interested in adding a bit of lighting to it. We reviewed a few options with him, devised a plan, and booked his appointment. Underbody Lighting We first tackled the lighting […]
Polaris RZR Audio System Featuring Rockford Tower Speakers
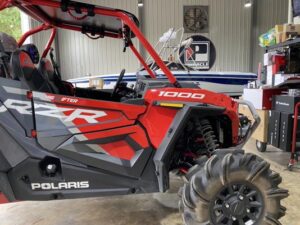
A new client reached out to us a while back about installing a Polaris RZR audio system in his new side-by-side. He didn’t want anything too complicated but wanted to hear it while he was riding and make sure others enjoyed his music too. Many of our clients have similar goals for their UTV, so […]
Chevrolet Colorado Bass Upgrade and Underbody Lighting
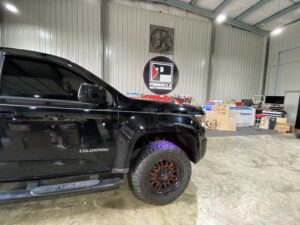
A while back, the owner of this Chevrolet Colorado stopped by to talk about upgrading the audio and lighting in his truck. After looking at the truck, we devised a plan for his Colorado bass upgrade and underbody lighting. Underbody Lighting The client wanted to add a bit of underbody lighting to make his Colorado […]
Dodge Lighting Upgrade for Challenger SRT 392
A repeat client of Pinnacle Autosound contacted us about getting a Dodge lighting upgrade for his Challenger. We talked with him about our different lighting options and put together a package that fit his needs. He loved our suggestion and booked his appointment. Vehicle Accent Lighting Improvements When we started installing lighting on vehicles years […]
Valdosta Client Gets Moomba Marine Stereo System Upgrades
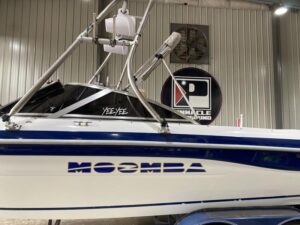
We got a call a while back from the staff at The Boat Doctors, in Lake City. They were working on a Moomba boat for one of their clients from Valdosta. While they were doing some repairs on the boat, their client asked them about upgrading the audio system too. We have done a number […]
Alfa Romeo Giulia Bass Upgrade with Custom Enclosure
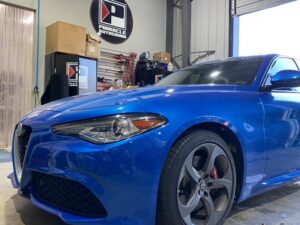
A former colleague from the mobile electronics industry contacted us about upgrading the bass in his son’s new car. He wanted to add subwoofers, an amplifier, and a custom enclosure to his son’s Alfa Romeo Giulia. We were honored that the client chose us to work on his son’s car and set up a time […]
Chapel Cross Lighting & Refurb for Florida Sheriffs Youth Ranches
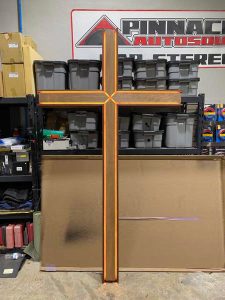
You might see some mention of the Florida Sheriffs Youth Ranches on our social media pages. The Youth Ranches is an organization we believe in, and we have seen firsthand the impact they have on the lives of Florida’s kids. We do what we can to help support the Youth Ranches, whether it’s sponsoring kids […]
Polaris Sportsman 4-Wheeler Stereo and Lighting Upgrades
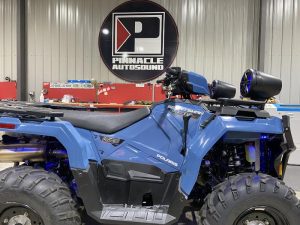
Side-by-sides and golf carts are a big part of the work we do at Pinnacle Autosound. A type of vehicle we are capable of working on, but don’t see as much of are 4-wheeler ATV’s. One of our Pinnacle team members recently purchased a Polaris Sportsman, so we were excited to get to outfit it […]
Gaming Bus Customization for Local Entertainment Service
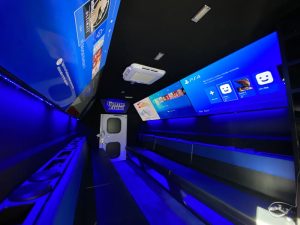
The folks at Game Zone gave us a call about converting the van that they tow their gaming trailer with into a gaming bus. We had them stop by Pinnacle Autosound with the bus so we could take a look at it. What they had was an empty bus. The scope of the project would […]