 One of our good friends acquired this Ram work truck and wanted to upgrade its stereo. The client wanted to use the 5-channel JL Audio amplifier we used in a previous stereo system. Along with upgrading the sound, he also wanted to add some more tech to his dashboard.
Ram Stereo Gone BIG
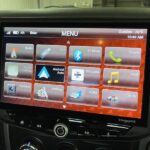
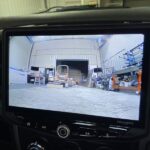
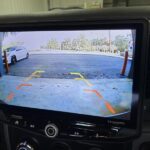
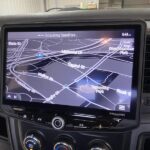
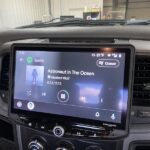
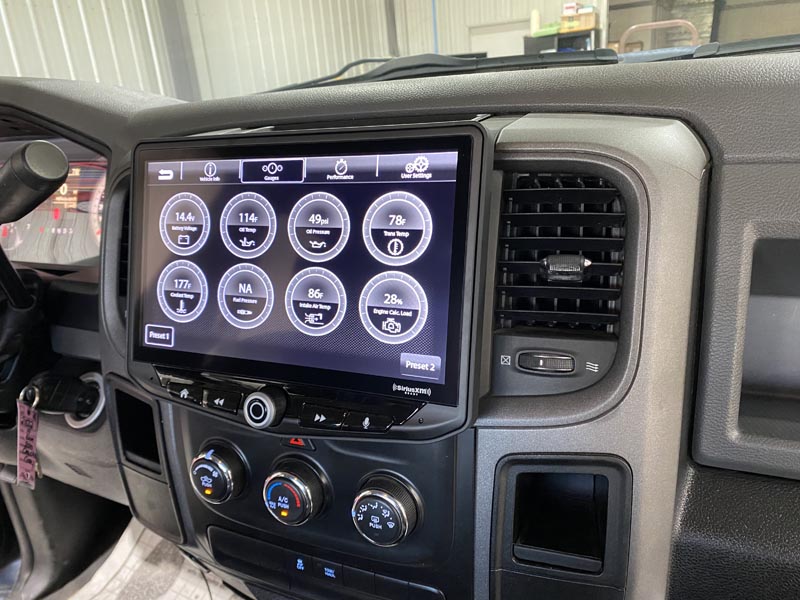
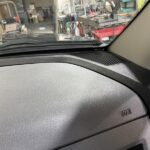
The client is into all things technology, so he was thrilled to learn we had a vehicle-specific kit for installing a Stinger Heigh10 radio into his dashboard. The Heigh10 radio would give the client endless media sources with the option for both Apple CarPlay and Android Auto. In addition to the media sources, the Heigh10 also has onboard navigation and can handle four different camera inputs. In this build, we would be using both a traditional rear camera as well as a front camera to aid in parking.
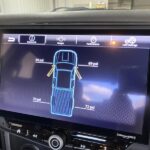
The Heigh10 radio also gives the client a wide range of gauges to check on all his truck’s significant functions. Another great feature is the status display that lets the client check the air pressure in all four tires from his radio!
Ram Speaker Upgrade
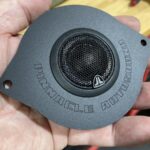
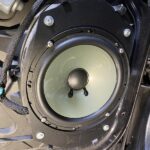

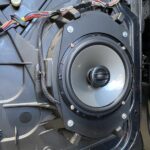
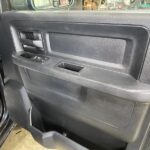
Once we installed the Ram stereo, it was time to move on to the speakers. We would be replacing the door speakers with JL Audio C2 speakers. The JL Audio C2 speakers offer excellent power handling and a nice clean sound. We used our CNC laser cutter to cut out adapter plates for all four woofer mounting locations and the tweeters’ adapters. We applied a sound deadener at each location and installed all the speakers.
Ram Amplifier Installation

As we previously mentioned, the client had a JL Audio xD amplifier from another build that he wanted to use in his work truck. We found a spot in the back of the truck, next to the rear wall, to mount the amplifier. We neatly routed all the wires to the amplifier and secured the amplifier to the vehicle floor.
Custom Fiberglass Subwoofer Enclosure
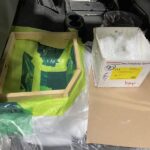
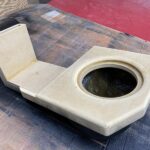

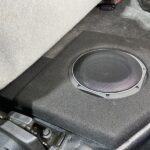
The final part of this installation was to upgrade the bass in the truck. “Upgrade” isn’t really the right word, because this Ram stereo system had very little bass to start with. We planned to fit a JL Audio 10Tw1 under the rear seat, on the passenger’s side, leaving the driver’s side open for storage. To maximize the output from the woofer, our goal was to build a vented enclosure. We used a trick from our good friend Louis Gonzales at Bay Area Audio Visions in Corpus Christi, Tx. Louis is famous for his Ram ported enclosure. His trick is having an external port that runs along the floor and up behind the rear seat. This takes the burden off the enclosure for having the airspace for the port. For subwoofers like the JL 10Tw1, the enclosures are tuned fairly low, which translates to a longer port. Using the “Gonzales Method” allows us to fit a long port without having to use airspace inside the enclosure. To further maximize the airspace we planned on fiberglassing the bottom portion of the enclosure.
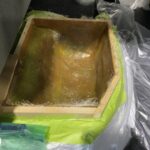
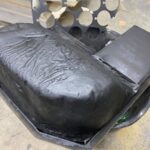
We started the enclosure by making the L-shaped port. Then we constructed a framework connected to the port on top of the seat area storage perimeter. When those pieces were assembled, we prepared the truck for the fiberglassing. We use protective plastic and tape to form a barrier on the truck floor. We then waxed the enclosure cavity space with a mold-release wax, to aid in the removal of the fiberglass piece. We added additional plastic around the surrounding areas of the truck to protect the other surfaces from any messy fiberglass resin.
The next step was to begin the fiberglassing process. When fiberglassing, we want to use just enough resin to saturate the mat. Any resin beyond what is necessary to wet the mat is just wasted. After we had laid down several layers of 1.5oz mat, we let the fiberglass cure.
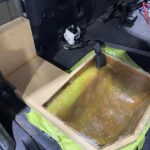
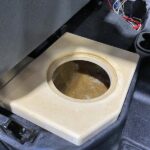
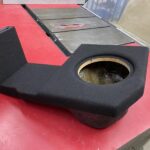
Popping the molded piece out was easy, thanks to the release wax. From there, we completed the enclosure by adding a top layer. The top layer was comprised of the top piece and an additional layer that helped to recess the subwoofer. We carpeted the enclosure with a black automotive-grade carpet and painted the underside of the fiberglass with black paint. All that was left was to drop the enclosure in its hole, install the subwoofer, and wire it to the amplifier.
System Setup and Delivery
Our final step in this project was to set up the amplifier and radio. We adjusted the gain controls and crossovers on the amplifier so that the speakers and subwoofer played to their full potential. We set up both the front and rear cameras on the radio and a few other vehicle settings. After vacuuming and cleaning the truck, we delivered it to the client. He was impressed with the amount of bass that the single 10-inch subwoofer had and was blown away by the 10-inch screen too. Contact us or stop by if you would like to learn about our Ram stereo upgrades for your truck.